Table of Contents[Hide][Show]
Few things capture the memory of a trip better than a photograph. From exotic landscapes to a family gathering, a picture, as the old adage goes, is worth a thousand words.
Today, the modern traveler is expected to blow away friends and family with photos of his/her adventures both at home and abroad. So if you don’t know how to take a good picture, you may end up disappointing both yourself and those who are looking to be inspired by your travels via a great photo collection.
Don’t worry, there’s good news. Taking great travel photos is easier than you think and right at your fingertips (or in your pocket).
With the ever-advancing technology of smartphones, it’s easier than ever to capture your memories on the go. For the traveler who can’t afford the time, space, or price tag of lugging around a high-end DSLR camera, the iPhone is able to capture photos and videos in stunning detail. All in the palm of your hand!
If you can run a business, manage your finances and do your shopping on your phone, why not use it to take feed-worthy photos too?
The smartphone keeps getting smarter
Smartphone camera technology has exploded in recent years. Vibration reduction, mechanical apertures, manual exposure settings, and stunning resolution are becoming standard features in most smartphones. But guts alone won’t make a good picture. A carefully composed frame and user know-how are the keys to a great photograph.
While snapping great iPhone photos in ideal conditions is easier than ever thanks to the advanced technology, there’s no equivocating taking a good shot when conditions are less than ideal, or if your demands go beyond the rank-and-file pics that fill the average person’s camera roll.
Let’s face it; if you’re spending your hard earned money to go on a trip, it’s worth the extra effort to get the most from your smartphone’s camera. So if you really want to squeeze every ounce of potential from your phone, you’ll need a proper understanding of basic photography concepts and what gear you’ll need to make your camera roll and feed the envy of your friends and followers.
This article will cover three simple principles of photography and the tools needed to support them when using your iPhone. The 3 principles are:
- The Exposure Triangle,
- Lighting and
- Stabilization.
We will cover what each is, why it’s important, and if it can be addressed with your iPhone’s camera or if additional gear or an app is required.
Smartphone Photography Concept #1: The Exposure Triangle
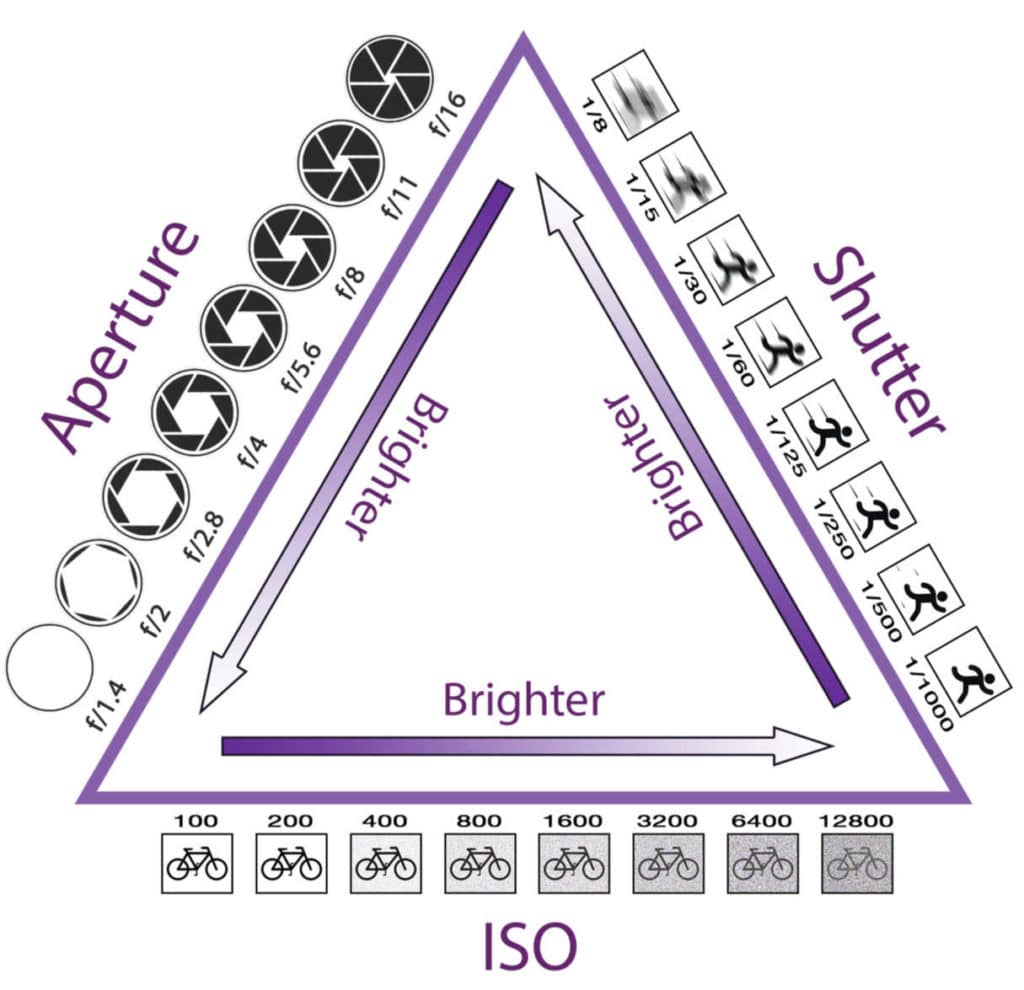
Shutter Speed, Aperture, and ISO make up what is called the “Exposure Triangle”. Cameras of all kinds use a combination of these three elements to make a properly exposed picture.
- ISO is the artificial light your camera adds to an image to brighten it. As the ISO increases, the image becomes brighter and will have more of a grainy look.
- Shutter Speed refers to how fast your camera opens and closes a “window”, allowing light to hit the sensor. When there’s a lot of light, the shutter usually opens and closes quickly. The opposite is true in low-light conditions.
- Aperture refers to a diaphragm that gives even more control to how much light enters your camera, as well as affecting something called depth of field (that crisp, uniformed focus of a landscape, or the creamy, soft look around the corners of a close-up shot or portrait).
Your iPhone’s camera automatically juggles between the three elements of the exposure triangle in an attempt to take the perfect picture.
Setting ISO exposure manually with the iPhone
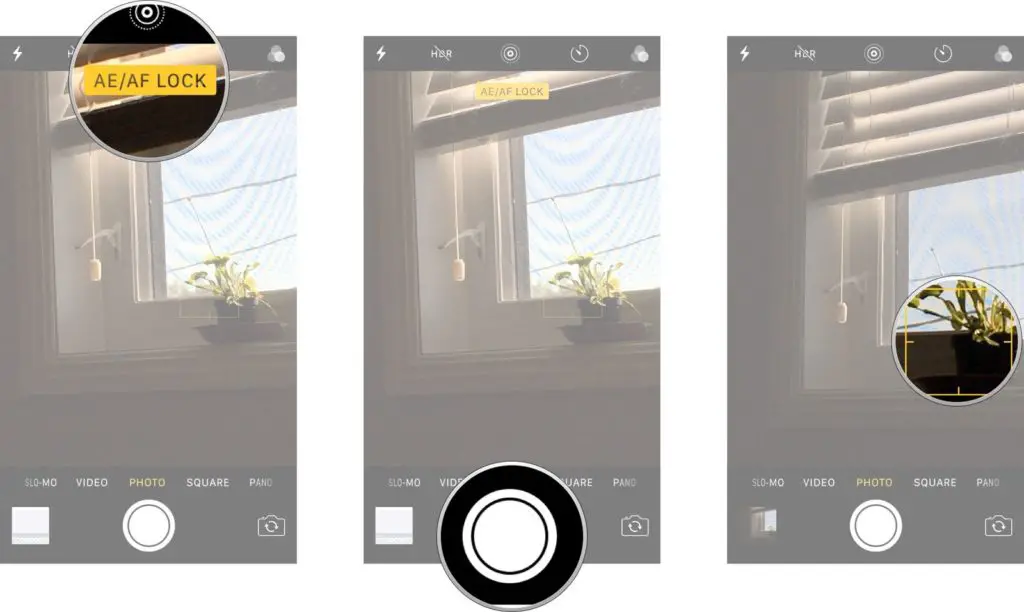
The iPhone has the ability to manually set exposure and focus within the native camera app. It’s actually fairly simple. Just launch the camera app and find the focal point you want to lock in on. Once you know your focal point, all you have to do is tap the screen and hold the focal point until you see an AE/AF Lock banner appear at the top of the screen. This will to lock the focal point and exposure.
“AE” stands for Auto Exposure which refers to the brightness of the image. “AF” stands for Auto Focus which refers to the part of the image appears in sharp focus.
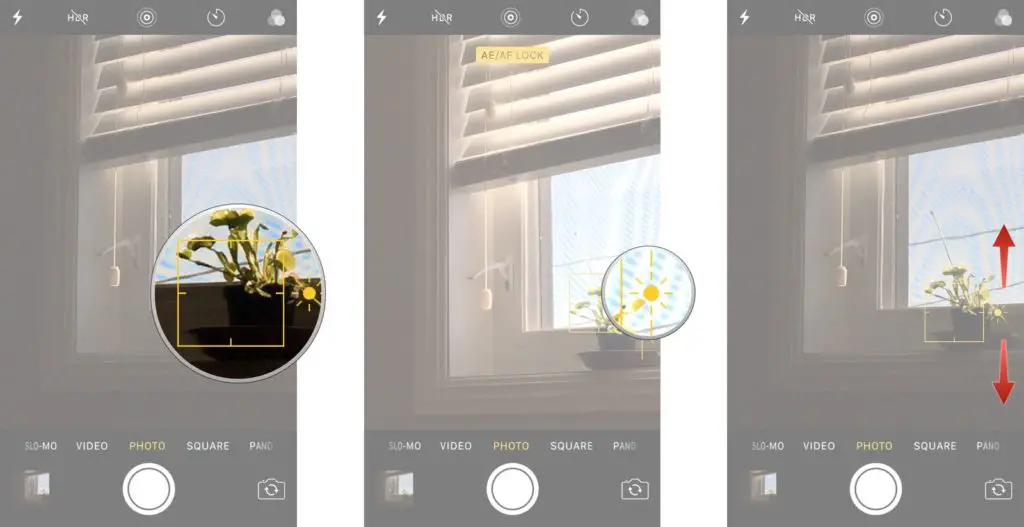
Now that you have locked in on your focal point, you can tap and move the exposure button that appears next to it (it’s the button next to the focal box that looks like the Sun). This is a slider that allows you to adjust the exposure. Use your finger to drag the sun up or down to adjust the exposure bias (i.e. to make the image lighter or darker).
Moving the sun up increases ISO and pulling it down decreases ISO. Put another way, a lower ISO generally means ‘low noise’, but a darker picture, while a higher ISO generally means ‘high noise’ and a brighter picture.
Setting Shutter Speed with the iPhone:
Currently, the iPhone doesn’t have a native, built-in setting that allows users to easily snap a slow shutter speed photo. However, there are some very reliable apps that can get the job done in a snap. One of the most popular is Slow Shutter Cam. At $1.99 it’s a great app to add to your iPhone Photography toolkit. Especially when you consider the amazing effects you can create with slow shutter speed photos!
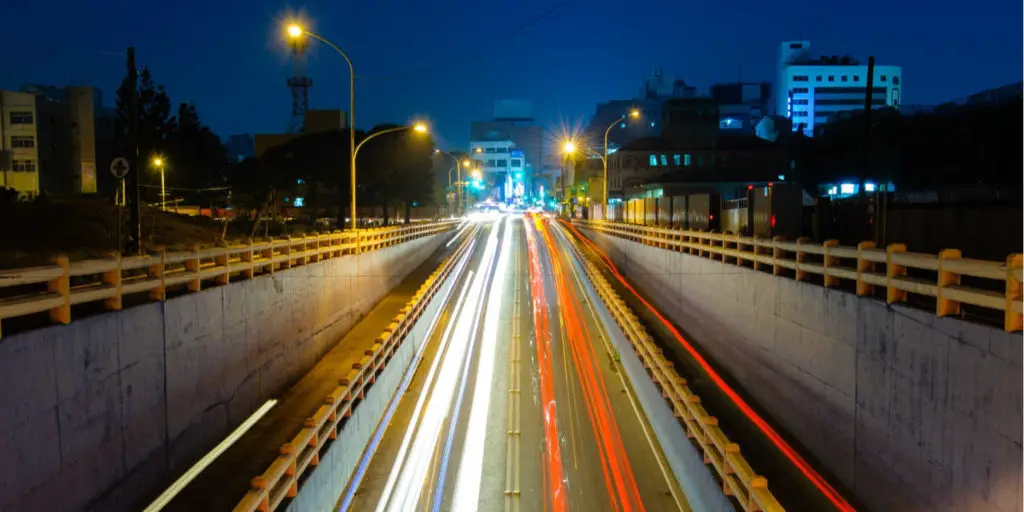

Here is a quick tutorial on using the Slow Shutter App:
Setting Aperture with the iPhone:
Aperture refers to the size of the opening of the lens through which light passes. Similar to shutter speed, its primary purpose is to control how much light reacts with the camera sensor. A bigger hole will let in more light and a smaller hole lets in less light.
Changing the aperture can have a huge visual effect on the image because it controls how much of the picture is sharp and in focus vs how much of the picture is blurred in either the background or foreground.

Native aperture and depth of field capability are areas where the iPhone struggles a bit. DSLR cameras have an aperture dial, but smartphones don’t, so they can’t offer the same level of flexibility and control that a DSLR camera will.
That said, the iPhone 8 Plus and iPhone X models have dual cameras and have made great strides in this area with the portrait mode feature.
If you have an older model of the iPhone, you can help sharpen your focus with the AE/AF lock mode. The lock will make sure the focus of the shot is set and stays in place, even if you move the phone. Once it’s locked, you can adjust the exposure to suit by moving the “sun” button up or down.
iPhone Apps that create a blurred background image
If your iPhone does not have dual cameras, there are apps that can help you create a depth-of-field look by editing your photo after the shot has been taken.
Snapseed (iOS/Android) is a great iPhone app for many types of photo editing. One of its great features is the ability to control the areas of focus by using the “Lens Blur” module.
Here is a tutorial to that will show you how to use the “lens blur” feature of Snapseed:
There are other apps that create a depth-of-field look, but you have to be a pretty darn good photographer to outgrow Snapseed. So download Snapseed now and give it a try before you waste time testing out a bunch of camera apps. It’s free! Plus, the people at Google liked it so much that they bought the company. If Google likes it, it has to be good 🙂
Smartphone Photography Concept #2: Lighting
Anyone who’s taken a picture in a dark setting or has been frustrated with camera blur can attest that the results can often be very disappointing. In these instances, both your phone and your technique may need a little help.
The key to photography is light. The key to taking great photos on your iPhone is the wise use and manipulation of light. Get this right and you will be on your way to taking killer photos.
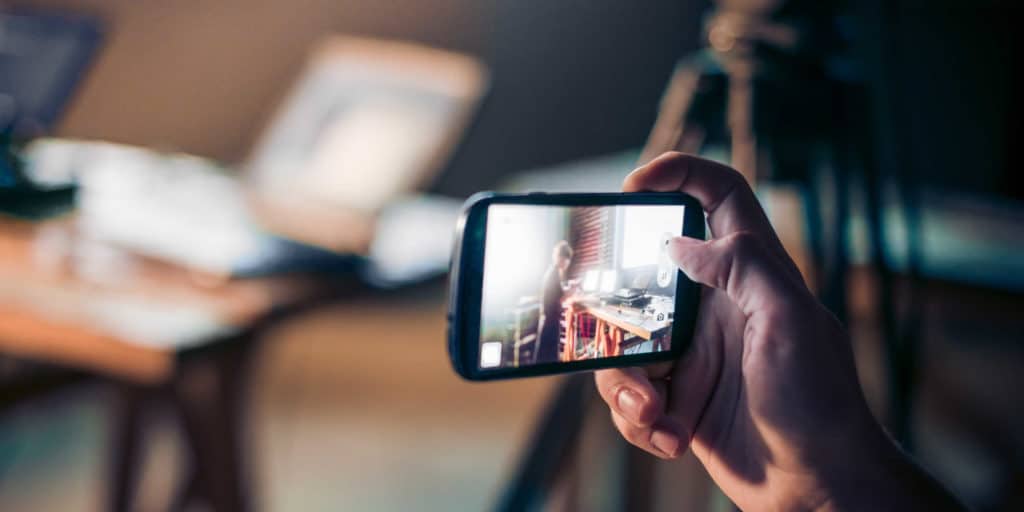
Think of light as fuel for your camera. Well-lit subjects are like high-octane racing fuel for your camera’s sensor, meaning the camera can quickly snap a picture for crisp, clean images. Low light is like burning gas tainted with water; the camera slows its shutter and bumps up ISO to allow the small amount of light available to make an impression on the sensor.
Because the shutter is slower, it’s more sensitive to movement. Think back to anytime you’ve taken a picture in a low-lit room. Chances are, your friend’s wild movements showed up blurry, the color was off, and the image was way too grainy for your liking. That’s because your camera had to slow the shutter speed and bump up ISO in an effort to make the best of the shoddy amount of light in the room.
You’ve also probably noticed that when you use flash, the images become much crisper. That’s because your shutter can now close quickly, and the camera doesn’t have to introduce more artificial light (ISO).
Throw you’re shaking hand into the mix, and more often than not hand-held pictures and videos are often disappointing in low-light situations.
Smartphone Photography Concept #3: Stabilization
When taking high-res photos, time lapses, selfies, movies, and other more advanced shots, holding the phone in the hand often doesn’t make the cut. Even the smallest movement in the hand could throw off distant focused landscapes by dozens of feet, making the image blurred.
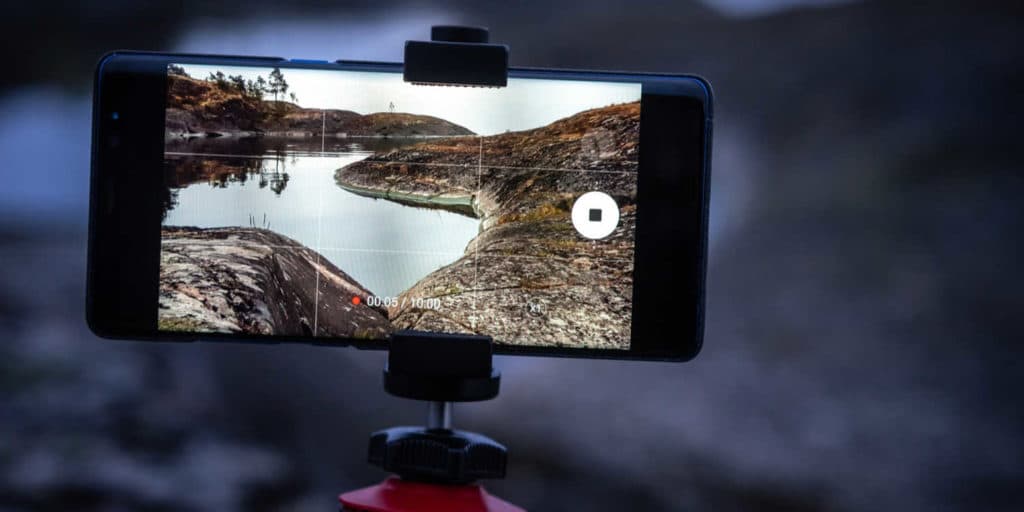
This phenomenon only increases as light becomes more scarce, so the camera must compensate for less light hitting the sensor by slowing the shutter speed, increasing the ISO, or expanding the aperture. All of which have the potential to reduce the overall quality of the photo.
Stabilizing the iPhone with a Tripod
When the smartphone photographer encounters these conditions, a stable platform is essential to bring out crystal clear pictures in almost any condition. Vibration reduction can only go so far before bowing its head to a piece of photographic equipment as old as the camera itself; the humble tripod.
I know what your thinking. A tripod? Really? What is this, 1972?
Thankfully, tripod technology has been kept in stride with smartphones. Stabilization products on the market today aren’t your mother’s heavy monstrosity she lugged around at family events. The tripod has come into its own in the digital age and is an essential high-tech accouterment worthy of being paired with the latest smartphone technology.
The JOBY GripTight ONE Mobile Line Up

Our favorite smartphone tripod system is JOBY’s GripTight Mobile Line. Joby’s newest suite of mobile products offers several well-designed, flexible smartphone tripods and accessories with the user and practicality in mind. What’s even better is that GripTight’s alluring design and utility are matched by its great low retail price. The GripTight ONE tripod is widely available for about $25.
For the budding “Pro-thusiast” smartphone photographer, JOBY’s GripTight products are the perfect way to make the most of your smartphone’s camera.
JOBY’s Mobile Product Line Up – Variations of the Tripod
The JOBY GripTight Mobile Line-up includes multiple variations of the tripod. The right one for you will depend on your personal style and if you take more photos or videos.
- GripTight ONE GP Stand – The original (and most popular) GripTight Tripod
- GripTight ONE Magnetic Impulse – Same size as GripTight ONE but with Magnetic Feet and a Bluetooth Remote
- GripTight GorillaPod Stand Pro – Larger than the GripTight ONE with a Locking Mount
- GripTight Pro Video GP Stand – Designed for Video with a locking “Pan and Tilt” Arm
- GripTight Action Kit – Mounts for both smartphones & GoPro + Bluetooth Remote + Cold Shoe Mount
For sake of brevity, we’ll focus on four JOBY components:
- GripTight ONE,
- GripTight ONE GP Magnetic Impulse,
- GripTight ONE Mount, and
- Impulse – Bluetooth Remote Camera Control for iPhone and Android.
The JOBY GripTight ONE vs. The GripTight ONE Magnetic Impulse
The GripTight ONE features strong legs that wrap around almost any imaginable item to deliver a stable platform for shooting. If there’s a picture to be taken, you’ll be hard-pressed not to find a place that this stand can’t master.
Tree limbs and rocks become rigid anchor points for your phone. Thanks to the rigid grip of each socket in the legs, the GripTight ONE can even grip onto things it can’t wrap around entirely, such as a telephone pole or wall corner. The legs are even strong enough to support a smartphone upside down.
Then they added magnets.
JOBY’s first magnetic tripod, the GripTight GorillaPod Magnetic, was built off the success of the original GorillaPod and was a big hit. However, they have since improved it and made it even better.
If the original version was considered flexible, JOBY’s latest version, the GripTight ONE Magnetic Impulse, is an outright contortionist. It features the same legs as the GripTight ONE, but they have magnets on the feet allowing it to stick to metal surfaces while supporting the weight of the phone.
When folded together, the legs magnetize into a rigid monopod for taking selfies or capturing movies. Plus it now comes with a JOBY Bluetooth remote, which only makes sense.
Retailing at around $60-$70, the Magnetic Impulse is more expensive than its simpler brother but is worth the price for added utility. However, if you want a magnetic tripod at a lower price, you can still buy the previous model, the Gorillapod Magnetic Tripod with an Ivation Bluetooth remote.
Here’s a quick video showing the features and components of the new GripTight ONE Magnetic Impulse.
The JOBY GripTight ONE Mount
The GripTight system revolves around the GripTight ONE Mount, a spring-loaded adapter that attaches to (almost) any smartphone with a simple yet effective gripping system.
- The rugged ABS plastic mount isn’t prejudiced to branding, either, as its ¼ inch screw allows easy attachment to traditional tripods.
- The spring-loaded mount can be pulled to accommodate a phone as large as 3.5 inches, such as an iPhone 7 Plus with a case.
- The clasps fold flat for easy storage, and is small enough to fit inside a pocket.
The GripTight Mount is included with the previously mentioned GripTight tripod variations.
If you already have a tripod for your DSLR, you can just buy the mount to attach your smartphone to it. However, the GripTight Mount retails for around $20, and the GripTight ONE retails for around $25 so for a few extra bucks just buy the GripTight ONE. That way you will get both the mount and the flexible tripod.
The JOBY GripTight Impulse
The GripTight Impulse is the JOBY Bluetooth Remote. It allows remote shutter actuation for selfies and group shots and reduces annoying camera shake in photos and videos.
Phones with manual cameras can take long exposure shots with help of the shutter remote, allowing you to capture professional-style pictures of stunning starry skies and creamy waterfalls. Simply press and hold the remote’s button, then connect your phone to the remote in your smartphone’s connectivity settings.
The remote works without an app, syncing directly with the phone’s camera, and is slightly larger than a quarter. The remote’s diminutive size and ease of operation allows it to be hidden while taking selfies or group photos
Get the picture? With the JOBY a GripTight tripod and a remote shutter release, you can turn over a new leaf in your photography game.


 Airline Carry-On Luggage Rules
Leave a Reply